This is part 2 of the RAD Chatroom tutorial. You can find part 1 here.
Adding a “Send” Button
A “Send” button is a pretty important part of any chat application. We’ll add a send button to our app by defining an action in our controller, and passing it to the ChatRoomView as follows. First we’ll define the action in our ChatFormController class:
// We're going to use a lot of static functions from the UI class for creating
// UI elements like actions declaratively, so we'll do a static import here.
import static com.codename1.rad.ui.UI.*;

// ...
public class ChatFormController extends FormController {

    // Define the "SEND" action for the chat room
    public static final ActionNode send = action(icon(FontImage.MATERIAL_SEND));
Then we’ll create a ViewNode to pass to the ChatRoomView constructor. This is can contain properties that the chat room uses to render itself, including which actions it should “embed” and where.
ViewNode viewNode = new ViewNode(
    actions(ChatRoomView.SEND_ACTION, send)
);

ChatRoomView view = new ChatRoomView(createViewModel(), viewNode, f);
If this is the first time you’ve seen a ViewNode definition, this may look a little bit foreign. All this does is register our “send” action with the “ChatRoomView.SEND_ACTION” category so that the chat room view knows to use it as the “send” action in the chat room. The full source of the ChatRoomController class after these changes is as follows:
package com.codename1.cn1chat;

import com.codename1.rad.controllers.Controller;
import com.codename1.rad.controllers.FormController;
import com.codename1.rad.models.Entity;
import com.codename1.rad.nodes.ActionNode;
import com.codename1.rad.nodes.ViewNode;
import com.codename1.rad.ui.chatroom.ChatBubbleView;
import com.codename1.rad.ui.chatroom.ChatRoomView;
import static com.codename1.ui.CN.CENTER;
import com.codename1.ui.FontImage;
import com.codename1.ui.Form;
import com.codename1.ui.layouts.BorderLayout;

// We're going to use a lot of static functions from the UI class for creating
// UI elements like actions declaratively, so we'll do a static import here.
import static com.codename1.rad.ui.UI.*;

public class ChatFormController extends FormController {

    // Define the "SEND" action for the chat room
    public static final ActionNode send = action(icon(FontImage.MATERIAL_SEND));

    public ChatFormController(Controller parent) {
        super(parent);
        Form f = new Form("My First Chat Room", new BorderLayout());

        // Create a "view node" as a UI descriptor for the chat room.
        // This allows us to customize and extend the chat room.
        ViewNode viewNode = new ViewNode(
            actions(ChatRoomView.SEND_ACTION, send)
        );

        // Add the viewNode as the 2nd parameter
        ChatRoomView view = new ChatRoomView(createViewModel(), viewNode, f);
        f.add(CENTER, view);
        setView(f);


    }

    /**
     * Creates a view model for the chat room.
     * @return
     */
    private Entity createViewModel() {
        ChatRoomView.ViewModel room = new ChatRoomView.ViewModel();

        ChatBubbleView.ViewModel message = new ChatBubbleView.ViewModel();
        message.messageText("Hello World");
        room.addMessages(message);
        return room;
    }
}
Now, let’s run the app in the simulator again.

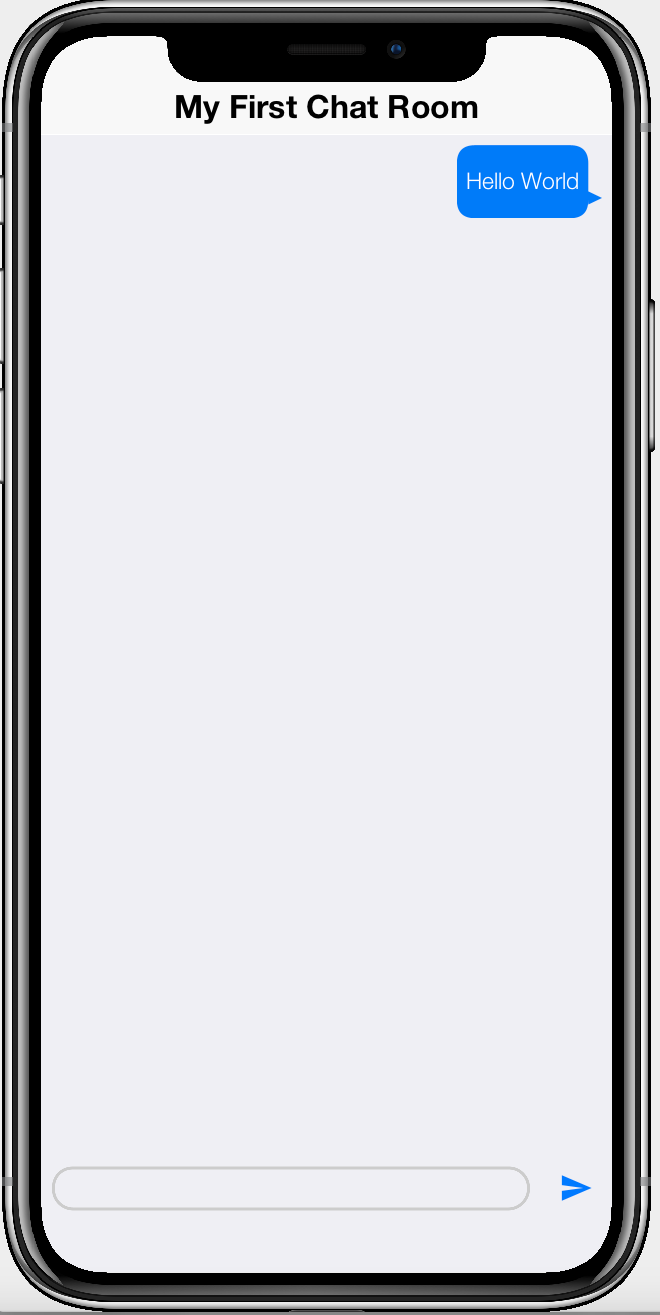
Notice that a “send” button has been added to the bototm-right of the form, next to the text entry box.

This is progress, but you may be disappointed, upon playing with the send button, to discover that it doesn’t do anything. In fact, when you click the “send” button, the view is sending an event to our controller. We just haven’t implemented a handler for it.
Let’s do that now.
Handling the “Send” Action Event
To handle the “send” event, we simply add the following inside the constructor of our form controller:
addActionListener(send, evt->{
    evt.consume();
    ChatRoomView.ViewModel room = (ChatRoomView.ViewModel)evt.getEntity();
    String textFieldContents = room.getInputBuffer();
    if (textFieldContents != null && !textFieldContents.isEmpty()) {
        ChatBubbleView.ViewModel message = new ChatBubbleView.ViewModel();
        message.messageText(textFieldContents);
        message.date(new Date());
        message.isOwn(true); // Indicates that this is sent by "this" user
                            // so bubble is on right side of room view.

        // Now add the message
        room.addMessages(message);

        // Clear the text field contents
        room.inputBuffer("");
    }

});
This listener will be called whenever the “send” action is fired. On mobile devices this will only occur when the user presses the “Send” button. But on desktop, it will also be fired when the user hits “Enter” while the text field is focused.
The event passed to this handler is an instance of ActionEventNode which includes all of the contextual information necessary to identify the source of the action, including the entity (the room), the UI component (the ChatRoomView) object, and the action (send), that triggered the event.
The logic in this handler should be pretty straight forward. It checks if the “input buffer” contains any text. Since the input buffer is bound to the text field, this is just checks if the text field contains any text. It then creates a new message with the input buffer contents, and clears the contents of the input buffer.
All of these property changes will fire PropertyChangeEvents to the view so that the view state will be updated automatically and instantly.
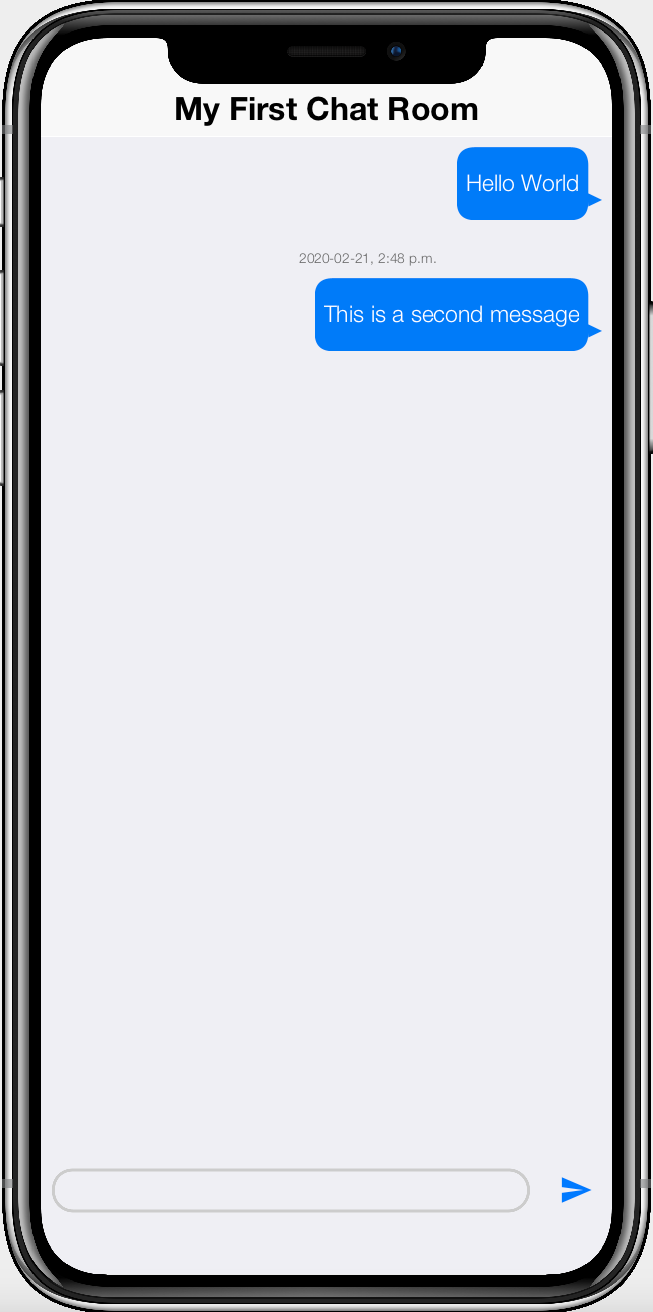
If you run the app in the simulator again, you should be able to enter text into the text field, and press send, to see a new chat bubble animated into place.

Bonus Points: Disable Send Button When Input Empty
In out action handler, we include logic to prevent sending empty messages. But it would be nice if we game the user a cue in the user interface that “send” doesn’t work when the field is empty. We can do this using the enabledCondition attribute in our action definition:
public static final ActionNode send = action(
    enabledCondition(entity-> {
        return !entity.isEmpty(ChatRoom.inputBuffer);
    }),
    icon(FontImage.MATERIAL_SEND)
);
This says that the send action should only be enabled when the “entity” is non-empty. The “entity” in this case is the view model for the chat room.
Start the app again in the simulator and notice that the “send” button toggles between enabled and disabled depending on whether there is text in the input field.


Next Week
Next week we’ll proceed with adding text messages from other users.


