
I recently became frustrated by the amount of work I had to put into recreating a Component hierarchy programmatically. For a test case, I needed to create a Form with a text field in the bottom, and a button just above it on the right.
I ended up with code that looked like:
Form f = new Form("Test Form", new BorderLayout());

Container south = new Container(new BorderLayout());
south.add(BorderLayout.SOUTH, new TextField());
south.add(BorderLayout.NORTH, FlowLayout.encloseRight(new Button("Submit")));

f.add(BorderLayout.SOUTH, south);

f.show();
The result looks something like:
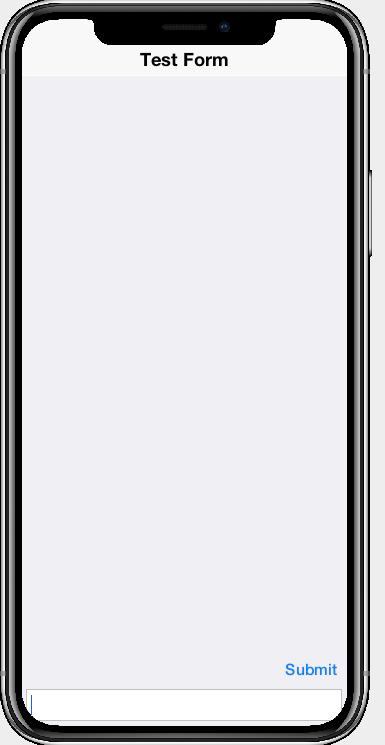
This isn’t all that bad, but it feels like it could be made simpler. It isn’t entirely obvious what the finished result will look like by looking at the Java code. This is largely due to the imperative notation. A declarative notation would be easier to read.
Codename One uses XML, a declarative language, as the underlying format for its GUI builder but this isn’t designed to be written or read by a human. It would be nice if I could express this UI using a notation that is both optimally succinct, and easy to read.
So, I created such a notation, and wrapped it in a class named UIFragment.
A New Declarative UI Notation
UIFragment supports both an XML and a JSON notation. Both are compiled down to the same underlying structure, which is based on the XML notation. I.e. If you use the JSON notation, it will just be converted to the XML version under the hood.
Let’s take a look at the above example, using XML:
<border>
  <border constraint="south">
    <$myTextField constraint="south"/>
    <flow constraint="north" align="right">
      <$submitButton/>
    </flow>
  </border>
</border>
This XML can be transformed into a Component using
Component cmp = UIFragment.parseXML(xmlString)
  .set("myTextField", new TextField())
  .set("submitButton", new Button("Submit"))
  .getView();
While this notation is slightly easier to read than it’s pure-java equivalent, it is still quite lengthy. For a UI like this, I’d like a notation that I can easily stick into a single-line
string. So let’s take a look at the JSON-ish UI notation.
{south:{north:{flow:[$myTextField], align:right}, south:$submitButton}}And this can be further shorthened using the single-character layout constraint aliases to:
{s:{n:{flow:[$myTextField], align:right}, s:$submitButton}}Notice that this JSON is not quite valid JSON. The property keys aren’t quoted, and neither are some of the values. This is OK, as the JSON parser for UIFragment is using non-strict mode, so as to eliminate all extra syntax that would only make our notation more difficult to write.
Using JSON, the entire Java source for the above example becomes:
Form f = new Form("Test Form", new BorderLayout());
f.add(
    BorderLayout.CENTER,
    UIFragment.parseJSON("{s:{n:{flow:[$myTextField], align:right}, s:$submitButton}}")
        .set("myTextField", new TextField())
        .set("submitButton", new Button("Submit"))
        .getView()
);
f.show();
While the total lines of code hasn’t changed, the portion related to constructing the UI is certainly shorter, and it is now easy to understand what the structure will be.
Syntax
The syntax is built around containers. Rather that have a container tag, I opted to use a separate tag for each layout type. This makes the syntax both easier to read and easier to write. Instead of <container layout="flow"> we simply have <flow>.
The supported layouts are shown in the following table.
| Layout | XML | JSON |
|---|---|---|
|
TableLayout |
|
|
|
BorderLayout |
|
|
|
FlowLayout |
|
|
|
BoxLayout X |
|
|
|
BoxLayout Y |
|
|
|
GridLayout |
|
|
|
LayeredLayout |
|
|
Placeholders
Rather than creating tags for every Component type, I chose to leave it simple. Only Containers can be expressed using the XML/JSON notation. Components should be represented using placeholders, and a corresponding call to set(String,Component) must be made on the UIFragment to bind a Component to the placeholder.
E.g.
UIFragment.parseJSON("{s:$myButton}")
    .set("myButton", new Button("Hello"))
The above example creates a Container with a button placed in its south position. The $myButton placeholder will be replaced by the button that we passed to set(). Notice that the placeholder is prefixed with a $.
The XML equivalent of the above is:
UIFragment.parseXML("<border><$myButton constraint='south'/></border>")
    .set("myButton", new Button("Hello"))
Attributes
There are a small number of attributes which can be added to elements of a UIFragment. These include:
-
uiid– The UIID to set on the element. -
id– An ID that can be used to obtain a direct reference to the Container via theUIFragment.findById(String)method. This is useful if you need to provide further customizations on the Container in Java that aren’t possible using XML or JSON. -
class– This works like the HTMLclassattribute works. It assignstagsto the container that can be used byComponentSelectorto select the resulting component. Multiple tags are separated by spaces.
There are also some attributes that are only applicable to certain container types. E.g. <flow> supports align and valign attributes which accept “left”, “right”, “center”, and “top”, “bottom”, “center” respectively for values.
<grid> and <table> both support rows and cols attributes which specify the number of rows and columns in their layouts respectively. On <table> these are optional attributes. If they are omitted it will use the actual data in the table to figure out the correct number of rows and columns.
Labels
Labels are a special case which are supported in UIFragments without having to use a placeholder. The XML notation supports a <label> tag, and the JSON notation will treat a string literal as a Label.
Examples
FlowLayout
The following are all equivalent
Container cnt = UIFragment.parseJSON("['Name', $name, $button]")
    .set("name", new TextField())
    .set("button", new Button("Submit"))
.getView();Container cnt = UIFragment.parseJSON("{flow:['Name', $name, $button]}")
.set("name", new TextField())
.set("button", new Button("Submit"))
.getView();Container cnt = UIFragment.parseXML("<flow><label>Name</label><$name/><$button/></flow>")
.set("name", new TextField())
.set("button", new Button("Submit"))
.getView();Container cnt = new Container(new FlowLayout());
cnt.add(new Label("Name"));
cnt.add(new TextField());
cnt.add(new Button("Submit"));And the resulting UI:

BorderLayout
Container cnt = UIFragment.parseJSON("{n:'Name', c:$name, s:$button}")
    .set("name", new TextField())
    .set("button", new Button("Submit"))
.getView();Container cnt = UIFragment.parseJSON("{north:'Name', center:$name, south:$button}")
.set("name", new TextField())
.set("button", new Button("Submit"))
.getView();Container cnt = UIFragment.parseXML("<border><label constraint='north'>Name</label>" +
"<$name constraint='center'/><$button constraint='south'/></bortder")
.set("name", new TextField())
.set("button", new Button("Submit"))
.getView();Container cnt = new Container(new BorderLayout());
cnt.add(BorderLayout.NORTH, new Label("Name"));
cnt.add(BorderLayout.CENTER, new TextField());
cnt.add(BorderLayout.SOUTH, new Button("Submit"));And the result is:

Box Layout Y
Container cnt = UIFragment.parseJSON("{y:['Name', $name, $button]}")
    .set("name", new TextField())
    .set("button", new Button("Submit"))
.getView();Container cnt = UIFragment.parseXML("<y><label>Name</label><$name/><$button/></y>")
.set("name", new TextField())
.set("button", new Button("Submit"))
.getView();Container cnt = new Container(BoxLayout.y());
cnt.add(new Label("Name"));
cnt.add(new TextField());
cnt.add(new Button("Submit"));And the result:

Box Layout X
Container cnt = UIFragment.parseJSON("{x:['Name', $name, $button]}")
    .set("name", new TextField())
    .set("button", new Button("Submit"))
.getView();Container cnt = UIFragment.parseXML("<x><label>Name</label><$name/><$button/></x>")
.set("name", new TextField())
.set("button", new Button("Submit"))
.getView();Container cnt = new Container(BoxLayout.x());
cnt.add(new Label("Name"));
cnt.add(new TextField());
cnt.add(new Button("Submit"));And the result:

GridLayout
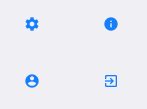
Container cnt = UIFragment.parseJSON("{grid:[$settings, $info, $account, $logout], cols:2}")
    .set("settings", new Button(FontImage.MATERIAL_SETTINGS))
    .set("info", new Button(FontImage.MATERIAL_INFO))
    .set("account", new Button(FontImage.MATERIAL_ACCOUNT_CIRCLE))
    .set("logout", new Button(FontImage.MATERIAL_EXIT_TO_APP))
.getView();Container cnt = UIFragment.parseXML("<grid cols='2'><$settings/><$info/><$account/><$logout/></grid>")
.set("settings", new Button(FontImage.MATERIAL_SETTINGS))
.set("info", new Button(FontImage.MATERIAL_INFO))
.set("account", new Button(FontImage.MATERIAL_ACCOUNT_CIRCLE))
.set("logout", new Button(FontImage.MATERIAL_EXIT_TO_APP))
.getView();The result is:
TableLayout
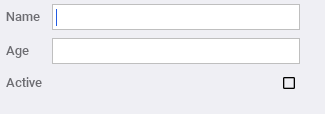
Container cnt = UIFragment.parseJSON("{table:[['Name', $name], ['Age', $age], ['Active', $active]]}")
    .set("name", new TextField())
    .set("age", new TextField())
    .set("active", new CheckBox())
.getView();Container cnt = UIFragment.parseXML("<table><tr><td><label>Name</label></td><td><$name/></td></tr>"+
"<tr><td><label>Age</label></td><td><$age/></td></tr>"+
"<tr><td><label>Active</label></td><td><$active/></td></tr></table>")
.set("name", new TextField())
.set("age", new TextField())
.set("active", new CheckBox())
.getView();The result is:
Reusing a Fragment
Suppose you have a UIFragment that defines a single row of a list. When this list grows to hundreds or thousands of rows, it may become expensive to re-parse the JSON or XML for each row fragment. Luckily, you don’t need to do that. You can create the fragment once, and then use it to generate a different view for each row.
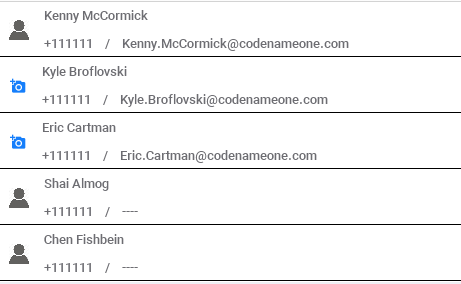
Consider this example using the Contacts API.
Contact[] contacts = Display.getInstance().getAllContacts(true, true, true, true, true, true);
UIFragment fragment = UIFragment.parseJSON("{w:$icon, c:{n:$name, s:[$phone, '/', $email]}}");
Container cnt = new Container(BoxLayout.y());
for (Contact contact : contacts) {
    Component row = fragment.set("icon", (contact.getPhoto() == null) ?
            new Button(FontImage.MATERIAL_ADD_A_PHOTO) : new Button(contact.getPhoto().scaledHeight(20)))
            .set("name", new Label(contact.getDisplayName()))
            .set("phone", new Label(contact.getPrimaryPhoneNumber()))
            .set("email", new Label(contact.getPrimaryEmail()))
            .getView();
    $(row).selectAllStyles().setBorder(Border.createUnderlineBorder(1))
            .setBgColor(0xffffff)
            .setBgTransparency(0xff);
    cnt.add(row);
}

f.add(BorderLayout.CENTER, cnt);
In this example, we parse the JSON only once, when UIFragment.parseJSON() is called. Then we iterate through each contact, setting the placeholders for each row. This works because once getView() has been called, the next subsequent call to set() will result in the fragment’s `view’ getting reset. This works similar to the way a prepared database query works in JDBC. The query is compiled (prepared) once, and changing the placeholders results in a different effective query.
And the result:
Accessing Components in the Fragment
The JSON and XML notations offer only a limited amount of customization options for elements. The uiid attribute allows you to set the UIID for a component, but that’s about it. If you want to customize it further, you’ll need to obtain a reference to the actual component, and customize it directly using its Java API. There are two ways to obtain references to the components in a fragment.
-
Add the
idattribute to the component, then use thefindById()method of the fragment to access it. -
Add the
classattribute to the component to add “tags” that can be selected by the ComponentSelector class.
findById()UIFragment fragment = UIFragment.parseJSON("{c:{flow:'Hello World', id:'MyContainer'}}");
Container myContainer = (Container)fragment.findById("MyContainer");
$(myContainer).setPaddingMillimeters(10);
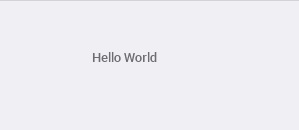
Container cnt = fragment.getView();In the above example we set the ‘id’ attribute on the nested FlowLayout Container, so that we can fetch it via findById(). Then we set the padding on that container using the Java API. The result:
class Attribute and ComponentSelectorContainer view = UIFragment.parseJSON("{c:{flow:'Hello World', class:'tag1 tag2'}, s:{flow:'South', class:'tag2'}")
.getView();
$(".tag1", view).selectAllStyles().setBgColor(0xff0000).setBgTransparency(0xff);
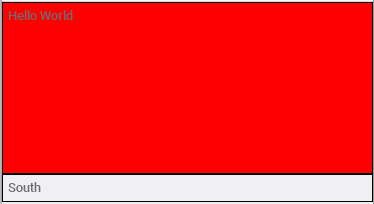
$(".tag2", view).selectAllStyles().setBorder(Border.createLineBorder(1));This example demonstrates the use of the class attribute for setting tags that can be used by ComponentSelector for selecting nested components in the fragment. We have two nested containers. One in the center with tags “tag1” and “tag2”; and a second component in the south with tag “tag2” only.
We’re able to select on “tag1” to set the background color of the first component to red. Then we selet on “tag2” (which selects both of the components), to set the border of both components to use a line border.
The result:
Summary
UIFragment provides simple way to user interfaces using a declarative syntax. It supports both an XML and a JSON syntax. The JSON notation is almost always more succinct and easier to read than the XML equivalent, and both provide advantages over directly defining the UI in Java code. You can embed placeholders inside your fragment’s JSON/XML and have them replaced by custom components when the fragment is compiled. Additionally, you can access nested components within fragments for further customization by tagging them either with an “id” or a “class” attribute. Finally you can reuse the same fragment to generate entire sets of components by setting placeholders with different values.


