The next plugin update will add support for native interfaces in UWP. This opens the door for you to really dig into the native features of Windows if you wish to do so. Crucially, this will also allow us to push forward with windows support on some of the cn1libs that require native functionality. As a proof of concept, I have updated the CN1WebSockets library to support windows. It now works on all major platforms: iOS, Android, Javascript, UWP (Windows 10), Simulator, and Desktop builds. If you require sockets in your app, I highly recommend web sockets, as it is the most portable option currently available.
For more information about the CN1 Websockets lib, check out my previous blog post on the subject.
Inside the Source of a UWP Native Interface
| This section describes how the C# implementations will look, but you don’t need to memorize this because you can just use the “Generate Native Access” option in your IDE to generate the basic structure, so you just need to fill in the methods with your implementations. |
Parameter Types
Native interface implementations in UWP are written as C# classes, and the similarities between C# and Java make it very intuitive. C# parameter and return types are all the same as their Java counterparts, except that boolean is named bool in C#. E.g. If your Java Native interface includes a method like:
public float multiply(String message, double a, double b, boolean round);
Your implementation would look like:
public float multiply(string message, double a double b, bool round) {
   // do the multiplication here....
   return result;
}
Peer Components
Peer components should be a subclass of FrameworkElement, but the parameter types and return types will just be object. You would need to cast them to the appropriate object type inside your method.
E.g. Consider a native interface designed to create a native Label widget. The Java native interface method signature is:
public PeerComponent createNativeLabel(String text);
And the UWP implementation of this method is:
public object createNativeLabel(string text) {
    Windows.UI.Xaml.Controls.TextBlock textBlock = null;
    impl.SilverlightImplementation.dispatcher.RunAsync(Windows.UI.Core.CoreDispatcherPriority.Normal, () =>
    {
        textBlock = new Windows.UI.Xaml.Controls.TextBlock();
        textBlock.Text = text;
        textBlock.Width = 240;
        textBlock.IsTextSelectionEnabled = true;
        textBlock.TextWrapping = Windows.UI.Xaml.TextWrapping.Wrap;
    }).AsTask().ConfigureAwait(false).GetAwaiter().GetResult();

    return textBlock;
}
A couple of things to note on this snippet:
-
We use the TextBlock class for our visual component, which is a subclass of
FrameworkElement. -
All interaction with UI elements in UWP must occur on the main UI thread, which is why it is wrapped in a
dispatcher.RunAsync()callback. See the following section on the UI thread for more information. -
The return type of this method is
object. -
Some portions of this snippet require
using System;at the beginning of the file.
The usage for this method would look something like:
// ntv = instance of the native interface
// hi = a form
PeerComponent nativeLabel = ntv.createNativeLabel("This is a native label");
nativeLabel.setPreferredH(200);
hi.add(nativeLabel);
The UI Thread
Most things in UWP are expected to occur on its main UI thread. This is especially the case when you are working with UI elements. The easiest way to run code on the UI thread is via the com.codename1.impl.SilverlightImplementation.dispatcher.RunAsync() method, as shown in the snippet above. This will run the code asynchronously. If you need to wait for the result of some code that occurs in this callback, as we did in the example above, then you can chain .AsTask().GetAwaiter().GetResult(); to RunAsync(). This will effectively run your code synchronously.
.AsTask() is only available if you add the using System; to the beginning of the file.
|
3rd Party Native Dependencies
If your native interface depends on a 3rd party native library, your best option right now is to use the windows.depedencies build hint to add versioned dependencies from the nuget repository.
Syntax for this build hint is as follows:
windows.dependencies=Lib1Name:Lib1Version,Lib2Name:Lib2Version,etc...
E.g. Suppose we wanted to add LevelDB version 1.18.3 as a dependency. We would have:
windows.dependencies=LevelDB.UWP:1.18.3
Working in Visual Studio
When developing native interfaces, the process I usually follow is:
-
Create the native interface in java (in my CN1 environment – Netbeans, Eclipse, IntelliJ, etc..).
-
Generate native access to generate my stub inside the “native/win” directory.
-
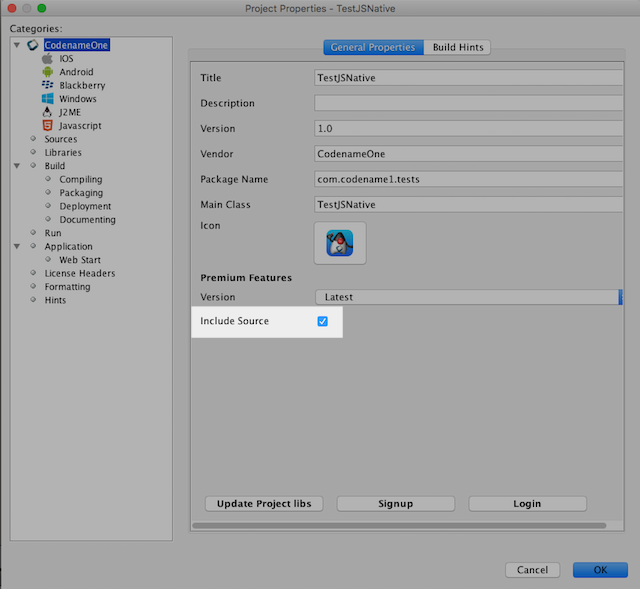
Enable the “Include Sources” option for my project so that the build server will generate a Visual Studio project for my app.
-
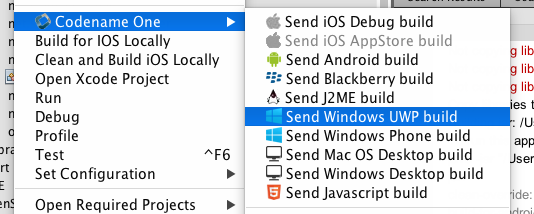
Build the project for Windows UWP.
-
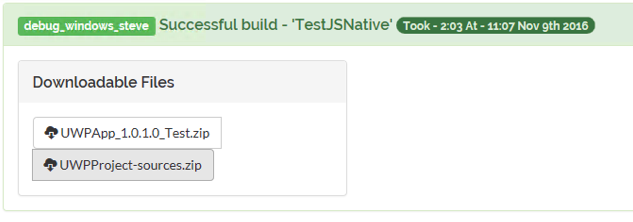
Download the sources zip file.
-
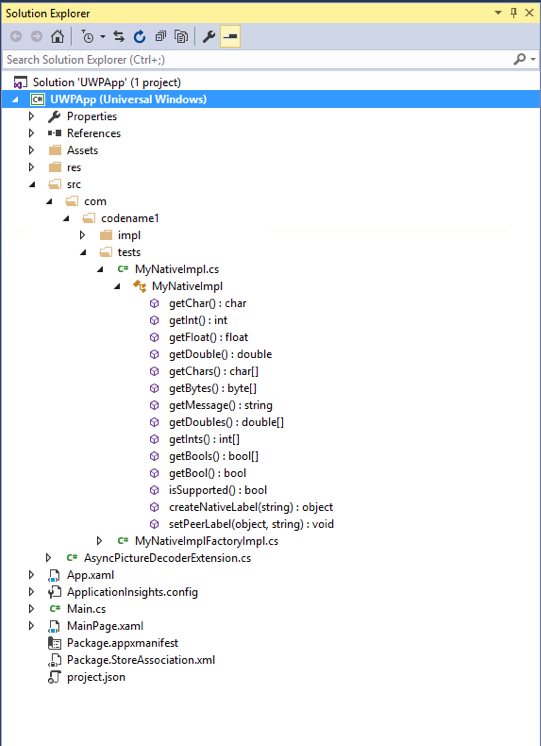
Open the “UWPApp” project in Visual Studio. The project is a Visual Studio 2015 project.

-
Open and edit the native implementation (you’ll find it in the appropriate structure inside the “src” directory.
-
Test the app in Visual Studio.
-
When it’s all working, copy your native implementation’s source back into your CN1 project.
References
-
For a full example of a UWP native implementation, check out the UWP websockets implementation.


2 Comments
Great!
WOW! Steve this is good.